
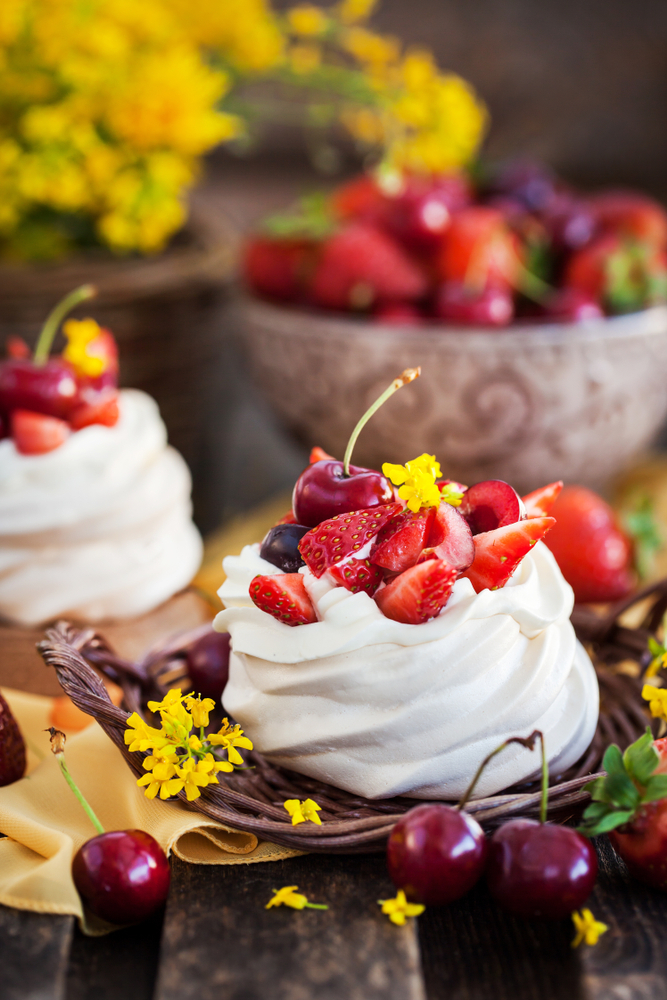
Mini Pavlovas are a delicious and elegant dessert that are perfect for special occasions or as a fun addition to any dinner party. These bite-sized treats are made from a simple mixture of whipped egg whites, sugar, and vanilla, and are typically topped with fresh fruit and a dollop of whipped cream.
Pavlovas, named after the famous ballerina Anna Pavlova, originated in New Zealand and Australia in the 1920s. They are known for their crisp, meringue-like exterior and soft, marshmallow-like interior. The mini version of the pavlova is a fun and easy way to enjoy this classic dessert.
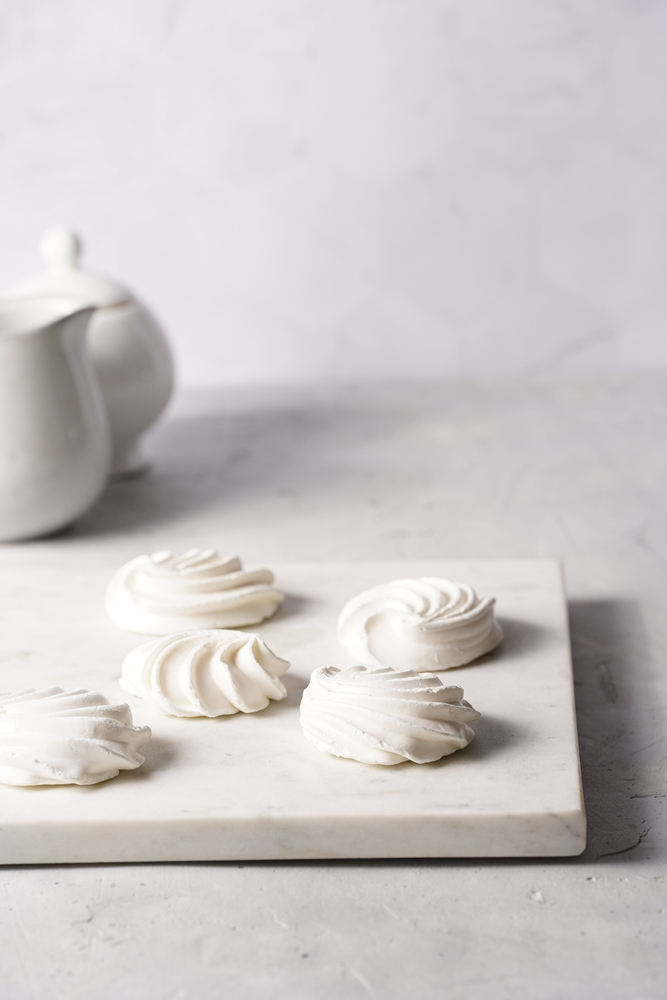
Difference between pavlovas and meringue
Pavlova and meringue are both desserts that are made with whipped egg whites and sugar, but they are prepared and served differently.
Meringue is a sweet, fluffy mixture of whipped egg whites and sugar that can be used as a topping for pies and other desserts, or as the base for various confections. It can be cooked at low temperatures for a long time to make it stable, and it is often crispy on the outside and chewy on the inside.
Pavlova, on the other hand, is a dessert that is made by baking a meringue base and filling it with whipped cream and fresh fruits. It is named after the Russian ballerina Anna Pavlova and is a national dish of New Zealand and Australia. Pavlova has a crisp crust and a soft, marshmallow-like center, and it is typically served as a large cake or as individual portions.
In short, meringue is a whipped mixture of egg whites and sugar, while Pavlova is a dessert made of a meringue base with whipped cream and fruits.
Why you’ll love this recipe:
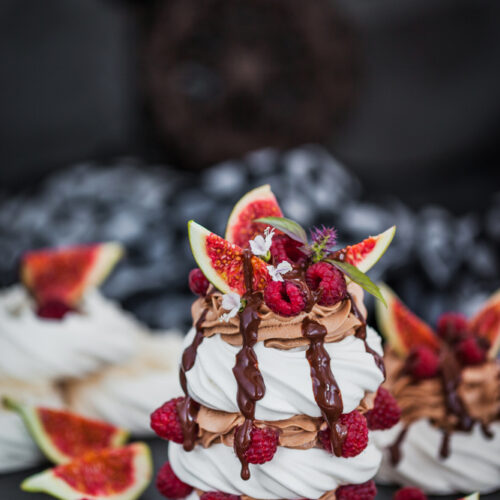
- They are visually appealing: Pavlovas have a beautiful, crisp crust and a soft, marshmallow-like center, which makes them a visually stunning dessert. The combination of meringue and whipped cream and fresh fruits can make a beautiful presentation.
- They are versatile: Pavlovas can be made in various shapes and sizes, from large cakes to individual portions, and they can be topped with a wide variety of fruits and other ingredients, making them a versatile dessert that can be tailored to suit any occasion or taste.
- They are light and refreshing: Pavlovas are made with whipped egg whites and sugar, which makes them a light and airy dessert. This is a great option for those who are looking for a sweet treat that isn’t too heavy.
- They are a perfect balance of textures: The crispy exterior of pavlova and the marshmallow-like center makes it a perfect balance of textures, adding a crunchy sensation on top of the soft and creamy one.
- They are a cultural dish: Pavlova has a strong cultural significance and is considered a national dish of New Zealand and Australia, and therefore they are often associated with celebrations and special occasions.
- They are easy to make: Pavlovas are relatively easy to make as they require simple ingredients
All in all, Pavlovas are a delicious and elegant dessert that appeals to many people’s taste, the balance of textures, ease of making, and the fact that it can be made in various sizes and decorated in many ways makes it a perfect option for any occasion.
Ingredients needed to make pavlova
Ingredients:
- 2/3 cups egg whites 5-6 eggs
- 1 1/4 cup granulated sugar / white caster sugar
- 1 tsp white vinegar
- 2 1/2 tsp corn starch
- 1 tsp vanilla extract (optional)
Toppings:
- Whipped cream
- Fresh fruits of your choice (such as kiwi, strawberries, and passionfruit)
How to make mini pavlovas
- Preheat your oven to 300°F (150°C). Separate egg whites and let them come to room temperature
- In a large stand mixer bowl, beat the egg whites until they form stiff peaks.
- Gradually add the sugar to the egg whites, one tablespoon at a time, while continuing to beat the mixture.
- Once all the white sugar has been added, beat the mixture for an additional 2-3 minutes, or until it is glossy and thick.
- Add the vinegar, vanilla extract, and cornstarch to the mixture, and beat for 30 seconds.
- Scoop the mixture onto the prepared baking tray lined with a sheet of parchment paper
- Using a spoon, pipping bag, or an ice cream scoop, to form small, round mounds. Be sure to leave some space between each mini pavlova, as they will spread during baking.
- Use the back of a large spoon to create a small indentation in the center of each mini pavlova, which will later be filled with whipped cream and fruits.
- Bake the mini pavlovas in the preheated oven for 1 hour, or until they are crisp on the outside and soft on the inside.
- Once the pavlovas are cooked, turn off the heat and let them cool inside the oven for 4 – 10 hours.
- Once the mini pavlovas are cool, carefully remove them from the baking sheet and fill them with whipped cream and fresh fruits.
Note: To achieve a good pavlova, it’s important not to open the oven while they’re baking and to let them cool inside the oven after they’re done.
You can also play around with the recipe by adding flavors to the meringue like lemon, chocolate, or coffee.
What to top pavlovas with
Once the mini pavlovas are cooled, they can be topped with a variety of delicious ingredients. Popular pavlova toppings include:
- fresh berries; strawberries, raspberries, and blueberries,
- Kiwi
- Passionfruit.
- Whipped cream
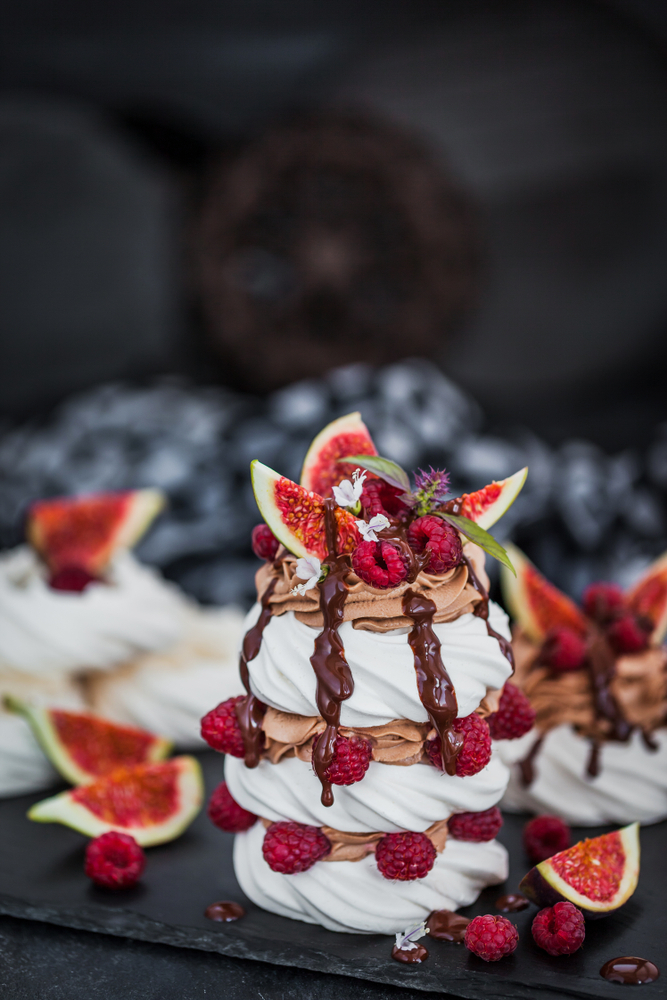
- Chocolate ganache or chocolate shavings -This can add a rich, chocolatey flavor and a decorative touch to the pavlova.
- Pomegranate arils
- Mango
- Figs
- Mint leaves
- Papaya
- Fruit compotes: A compote is a cooked mixture of fruit, sugar and sometimes spices. This can add a more complex flavor to the pavlova, and also a more sophisticated look.
- Jams and preserves, raspberry coulis
- Nuts: such as toasted almonds, hazelnuts or macadamia, can be added to give a crunchy texture and a nutty flavor to the pavlova.
Ultimately, the toppings you choose for your pavlova will depend on your personal taste and preferences, you can also experiment with different combinations to find your perfect topping.
How to store pavlova
Pavlovas should be stored in a way that will keep them fresh and prevent them from becoming soggy. Here are a few tips for storing pavlovas:
- Cool the pavlovas completely before storing them: It is important to let the pavlovas cool completely before storing them, as storing them while they are still warm can cause the meringue to become soft and sticky.
- Keep them in an airtight container: Once the pavlovas are cool, place them in an airtight container to keep them fresh. Make sure the container is large enough to accommodate the pavlovas without squishing them.
- Store them in a cool, dry place: Pavlovas should be stored in a cool, dry place, away from direct sunlight and heat sources. The ideal temperature is around 60-65°F (15-18°C).
- Do not add toppings until ready to serve: To prevent the pavlova from becoming soggy, it’s best to add whipped cream and fruits just before serving.
- Pavlovas can be stored for 1-2 days: Pavlovas are best enjoyed the day they are made, but they can be stored for 1-2 days. However, the meringue may become softer over time, so it’s best to serve them as soon as possible.
It’s also worth noting that if you are making a pavlova in advance and it’s not going to be served the same day, it’s better to store the meringue and whipped cream and fruits separately, then assemble the pavlova right before serving.
When to serve pavlovas
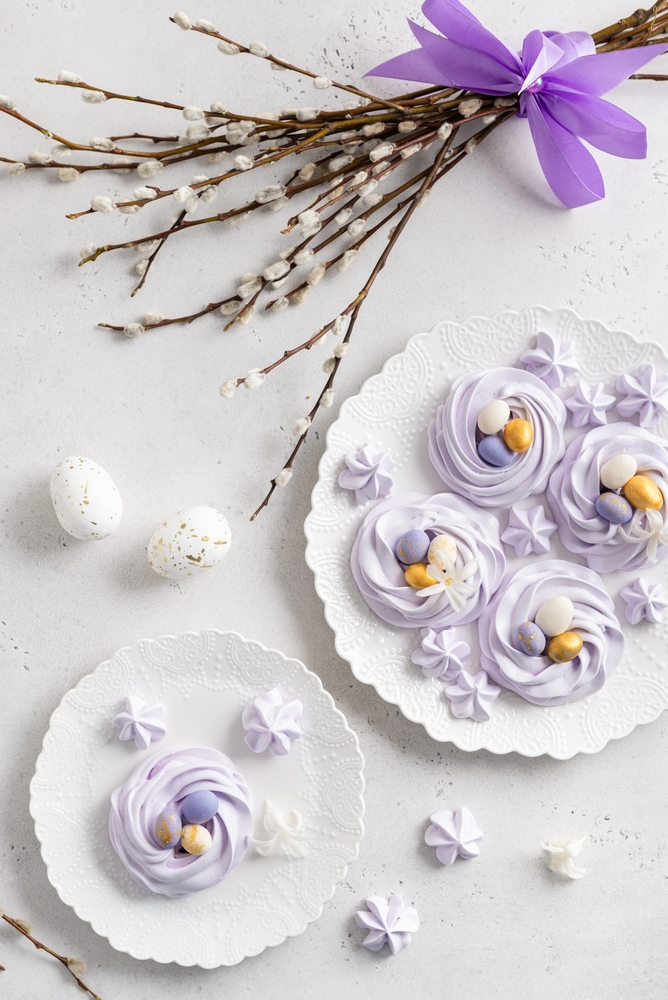
Pavlovas are a versatile dessert that can be served at any time of the year, but they are particularly popular during the summer months when fresh fruits are in season. They can be served as a dessert for special occasions, and the holiday season such as Christmas, Easter, birthdays, and weddings, or simply as a sweet treat to enjoy with friends and family.
Pavlovas are also popular for summer barbecues, picnics, and outdoor gatherings, since they are light, refreshing and easy to transport. They can also be served as a dessert option in a more formal settings, such as dinner parties, where they can be dressed up with a variety of toppings and decorations.
Mini pavlovas are a great option for entertaining as they can be made ahead of time and they also make for a beautiful presentation when arranged on a platter or serving dish. mini pavlovas are a delicious and beautiful dessert that can be enjoyed by all.
Mini Pavlovas
Equipment
- stand mixer
Ingredients
- 2/3 cups egg whites 5-6 eggs
- 1 1/4 cup sugar white caster
- 1 tsp white vinegar
- 2 1/2 tsp corn starch
Instructions
- Preheat your oven to 300°F (150°C). Separate egg whites and let them come to room temperatureIn a large stand mixer bowl, beat the egg whites until they form stiff peaks.
- Gradually add the sugar to the egg whites, one tablespoon at a time, while continuing to beat the mixture.
- Once all the white sugar has been added, beat the mixture for an additional 2-3 minutes, or until it is glossy and thick.
- Add the vinegar, vanilla extract, and cornstarch to the mixture, and beat for 30 seconds.
- Scoop the mixture onto the prepared baking tray lined with a sheet of parchment paper
- Using a spoon, pipping bag, or an ice cream scoop, to form small, round mounds. Be sure to leave some space between each mini pavlova, as they will spread during baking.
- Use the back of a large spoon to create a small indentation in the center of each mini pavlova, which will later be filled with whipped cream and fruits.
- Bake the mini pavlovas in the preheated oven for 1 hour, or until they are crisp on the outside and soft on the inside.
- Once the pavlovas are cooked, turn off the heat and let them cool inside the oven for 4 – 10 hours.
- Once the mini pavlovas are cool, carefully remove them from the baking sheet and fill them with whipped cream and fresh fruits.
Made these yesterday for a baby shower and they came out sooo cute and tasty!!! love this recipe – very easy to make, will surly be sharing and keeping it for future events! thank you 🙂